Showing posts with label Nightengale Family Goes Green. Show all posts

Saturday, April 16, 2011

DIY Back Yard Composting Basics

It's been about 2 weeks now since I got the house composting. I hope to see an excellent humus of plant nutrients after about 6 weeks. We have reduced our waste, learned more about our property and have great hope for a beautiful and well fed garden this year. Here are some more basics on how to get started, and tips on keeping a balanced compost.


I've come across a few good suggestions on additional tools that I am going to want to invest in. First is a composting or soil thermometer. While composting will probably still keep working, the decay process will continue regardless of the temperature. However, because compost works better in the shade, I might want to start monitoring the temp. Basically, I want to know that the bin is reaching an optimal decomposition temperature at least at some point before use. Second, since I've taken the trouble to build my own compost bin, why stop there? Composting needs water to remain balanced, therefore I propose the next project: home made rain collecting buckets!!! Commercial ones are jsut as expensive as those store bought compost bins. However, for similar supplies, and ones I have left over from the compost bin, I can create a cost effective as well as efficient rain bucket. Coming up next! I should also look into gloves, a dust mask, and safety goggles to help prepare the compost for distribution into the soil. Safety first :)

Compost: decay and reuse of waste, often to be used as plant food


Questions to ask yourself before you start your own compost:

*Why should I start composting?


1. Fertility to the soil

2. Microbial life in organic matter converts other soil elements into essential nutrients for growing plants

3. Texture allows air pockets for roots

4. Adds moisture

5. Drains excess moisture from plants roots


6. Onsite recycling


7. Improved soil


8. Self-sufficiency


9. Healthy plants


* How much time do you have to devote to this project? Keep in mind that the results of your project will directly reflect the effort and care you put into it. Be aware of your limitations and build a system that fits into your everyday life. Composting can take up a large amount of your time. Most holding containers are small and require being dumped almost every day, especially in a large family. Your bin or heap requires mixing and balancing at least on a weekly basis, if not every time you add a new layer. Make sure you have enough time to check on these areas of your home at least once a week. Keep it simple. Take scraps out to the compost on garbage day, this forces you to check into it but only adds a few minutes to something yoou are already doing.


* How much space do you have? First, look at where the compost will be going, not only where you will store it, but if it's going into your yard and garden. Knowing this in advance helps you to plan for a better fitting container, or may encourage you to go bigger and start your own heap. Be aware of the space you plan on using and try to understand how this will affect family members, pets, and neighbors. Try to plan your compost in a way where it is easily accessible and available to be transported to where you need it.


*How can I reduce the smells of my composting? Indoors: Keep a lid on it. This is the easiest way to prevent smells from overpowering your home. Outdoors: Keep a lid on it if you are using a container. Either way you should be adding lots of brown materials, such as dead leaves or grass, wood chips, or paper. A balanced compost won't smell any more than your garden, yard, or a barrel of dirt. Yes you can prevent odors if you work on it. *What do I do with it now? Add compost to potted plants. Spread in a thin layer over newly sprouting seed. Cover your lawn by raking outward of a large pile. Cover flower beds at the base of tall plants. Sell it. Donate it to local community farming projects.


*How will wild life affect my composting? Bugs will naturally want to help the composting process. It it perfectly fine to let the bugs do their work, but keep an eye out for an over abundance of any one type of pest. Also, watch out for bees! Yellow jackets especially love to build nests in cmopost heaps because of the nutrients and heat. If you notice these buzzing around, chances are they've invaded your heap. There is no easy way to draw them out, unfortunately. You might have to let the heap die out and the bees will leave naturally. Birds might also find your heap attractive. They will love to build a nest for hatching eggs, especially in the spring time. This process will only take a short amount of time. Before you know fuz=zzy little baby birds will be born and the oarent birds will fly away. Try to work around them. they won't really bother you if you don't disturb their nest, and they won't take up much space to begin with. If you are using a plastic bin, check for teeth marks and gnawing on a regular basis. These are signs you have mice. While mice can help the decaying process along, they arae more likely to enter your house, garage, or barn after sampling the compost that you offer in the yard. You should also be mindful to mix your compost carefully because of the guests that may invite themselves in.


*Can composting affect my health?
While it's unlikely and improbable, there are some health concerns that are associated with compost. First, if you are composting for food plants, meaning you are going to eat the plants that grow from your compost, make sure you wash these well. A vinegar rinse can help immensely with washing away bacteria. If you are worried, cook thoroughly, or use a commercial vegetable rinse. When in doubt, return questionable produce back into the compost, and consider cleaner composting for food in the future. This would mean using a protected bin that only holds untreated browns and greens.


Specific illnesses to watch out for:


Hepatitis A

Farmer's Lung

Paronychia

Histoplasmosis

Legionnaire's Disease

Tetanus


Interesting Composting Information


Temperature Phases

Oxidation 55-65


Reduction 65-85


Degradation 85-145


Conversion 55-145


Maturation 55


Sunday, March 27, 2011

DIY Back Yard Compost Container


Making your own compost creates just one more way for your home to be self-sufficient. Compost can be used to fertilize your yard, garden, and potted plants. It can also be spread out over as ground cover during cold months to help protest your grass and gardens. Several ways exist to get started, so you will have to think about what is best for your home. Also, some cities don't allow for composting openly even in your own backyard, so please be sure to check into this before investing in the project. Composting costs range from very little to very expensive. I'm going to show you one way to get started for about $40.


Things you will need to buy:


1 large clean garbage can with lid ($10)


* Use Plastics #2 HDPE, #4 LDPE, or #5 Polypropylene. These are the only food safe plastics that will be able to withhold the temperature.


1 small shovel ($10)


1 roll of mesh screening, soft ($6)


1 roll outdoor duct tape ($9)


2 bungee cords to fit over the lid of your garbage can (about $2 each)


Things you probably have around the house:


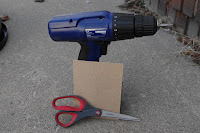
1 power drill OR hammer and awl


10 bricks


1 piece fine sand paper


scissors


Step 1: Gather your supplies


Step 2: Create air and drainage holes


Using the drill, or hammer and awl, create air and drainage holes in your garbage can. These can be placed anywhere, so long as there are enough to effectively allow of movement of air and water. The drainage holes in the bottom keep water flowing through so that the material doesn't get too wet. The air holes keep movement of oxygen constant to encourage decomposition. Keep holes small and nice spaced apart. Use the sand paper to file down and soften each hole(optional)


Step 3: Add screen mesh around the bottom of the can, held on with duct tape. This helps with proper drainage as well as discourages rodents from gnawing through and into your soon to be compost.


Step 4: Set up hollow bricks in a circle in order to allow for proper drainage. Regular bricks can work, but you'll want to put them on their sides so that there is still space for water to seep back down to the ground. Place your new compost bin over the bricks. You may need more bricks to keep the composter level if the ground is at all bumpy. You will want to set this up somewhere that animals are less likely to bother the bin, but that it will get at least partial sunlight. One of the reasons small bins work is that the self-contain natural heat from the sunlight, as well as from the natural gases.


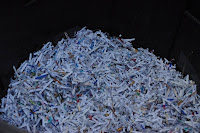
Step 5: Start layering your compost. Keep this ratio in mind: 1-1-2. That's one part brown waste, or dried materials. One part is green or vegetable waste materials. The last 2 parts should be dirt. Dirt, leaves, paper, green food waste, more leaves. Add about a gallon of water over the mix and let set. Make sure to keep layering as you go. Avoid putting plastics, ink dense advertisement paper, animal waste/byproducts, and daily garbage in your compost. Yard waste, fruit and veggie trimmings, coffee grounds and paper are good starts. Try to keep the balance of the compost too by using different layers of wet and dry materials. Keep adding water each time you add layers. Now you are ready to cap your new compost bin. Make sure to check back in a couple days and use your shovel to mix up the compost.


Friday, May 14, 2010

What does it mean to Go Green!?

The first time I heard the phrase "Go Green" I responded proudly "Go White." Coming from MSU, with my brother graduating from our rival U of M, there has been a lot of green and blue thrown around the house in the past 5 years. The only thing I knew about going green was wearing my alumni t-shirt and watching the big game each year. People often hear me state that I bleed green and I'm beginning to think that may have two meanings.

I was late in figuring out about recycling, about plastic seeping into my water, about animals and oil spills. I attended a prestigious, albeit, private, prep school where I focused solely on my own grades. My classes did not include environmental safety, or even health and nutrition. I studied the great classics, I spent my nights learning calculus and physics and recycling only meant returning bottles to get my 10 cents back.

That was probably my first experience with recycling: returning bottles. Michigan has one of the better programs, ten cents per bottle. It wasn't long before I was thinking about what happened to the other bottles that don't require that deposit. Soon enough my hometown was offering recycling services, Monroe is great at this and will take anything that doesn't have food on it(sorry pizza boxes). MSU's campus recycles everything, on campus, and thus, my green education truly began.

Over time, I have incorporated several little habits into daily life to help the world without really feeling the impact. This means I don't feel put out for having a bin dedicated to recycling. I've learned to depend on some of these habits, such as the fresh dairy milk that comes in a reusable and recyclable glass bottle. My first step in turning this house green depends on the family listing everything we are already doing, including prices and reasons for why it is important.

To figure out what we're already doing well, we decided it was important to define what "green" means to our family. I've compiled a list of words and phrases to try to create an idea of what I'm hoping to accomplish.

safe * environmentally conscious * low-impact * sustainable * organic * natural * recyclable * biodegradeable * pet-friendly * safe for pregnant women and babies * pre-recycled * non-toxic * ecological * locally grown * DIY *

Our House...

My family lives in a big old house that was built in the very early 1900's. It's just about 100 years old and clearly deserves a green makeover. I've recently worked on greening up a local convention, Penguicon, and finally feel ready for this major renovation. Over time, I will blog about how to turn such an antique home into something low-impact with a high carbon offsetting that's mostly DIY and within a family budget. Sounds amazing and dreamy, but truly possible when you know the right people. I'll be getting a lot of help from a few major resources, such as the awesome green architecture books, as well as support from friends and family.

My Plans:

1. Find out what parts of the house and family are already green, energy star, sustainable, etc. Basically, what has already been implemented, and the good habits we want to keep or improve.

2. Make a list of what NEEDS to be replaced. Look for local resources that are safe for the environment and within the budget. Prioritize the list.

3. Make a list of things that will need to be replaced in the next 5 years. Research the best ways to accomplish the tasks and create a budget.

Three major steps to get this project started, the question is, Nightengales - ARE YOU READY?!?!!?