http://ossbank.blogspot.com/
http://www.wikihow.com/Make-a-Seed-Bomb
http://billyandanuttama.wordpress.com/2010/08/21/how-to-get-free-seeds-from-the-government-seed-bank/
http://www.ars-grin.gov/npgs/acc/acc_queries.html
Green Living Barefoot Running EcoGeeks Natural Herbal Organic Recycle Upcycle Eco Friendly
http://ossbank.blogspot.com/
http://www.wikihow.com/Make-a-Seed-Bomb
http://billyandanuttama.wordpress.com/2010/08/21/how-to-get-free-seeds-from-the-government-seed-bank/
http://www.ars-grin.gov/npgs/acc/acc_queries.html
Why should we use our backyards, windowsills, or counter space to house ?
Working with what we have to create food, beauty, and spice gives us so much more than even the finest farmer’s market can provide. We gain control. This means knowing where your food comes from, not needing to ask about allergies or calories, and understanding how fresh the produce remains. We gain the opportunity to diversify our menus by adding hard to find plants and heirloom foods into our personal gardens. As farmers decrease world wide, backyard workers increase. While these two issues do not necessarily or directly affect each other, we are facing the problem of who is going to grow for us. Working at home supports home composting and home rain collecting. It also reduces food miles, equally decreasing your personal carbon footprint.
Michigan History
Therapeutic Horticulture
Start:
1. Start a journal. Pay attention to your steps, expectations, and understanding of the basic information that you receive. Keep track of soil and compost pH levels.
2. Work out a calendar so you know when to plant, when to transplant, water, feed, trim, and harvest your plants. Remember that some plants should be watered in the AM but others might need PM care.
3. Make a plan for space and plant choices. Match labels for the plans with the seedlings.
4. Take pictures!
Plan:
1. What kind of plants do you want to grow?
2. Will you plant anything edible?
3. Do you want annual plants or perennials?
4. How much space do you have?
5. How much time do you have?
If you are already feeling overwhelmed, start with one square yard. If this is already part of your backyard and is covered with grass, you will have to dig up the sod. The best use for it now is to fill it into empty patches, turn it upside down under trees or bushes, or throw it right into your compost.
Next, try to find out what grows locally. Start out with something simple, or with baby plants. Seeds can be temperamental, so take consideration for your time and space. Fruit trees can be awesome first steps into growing your own
Problems to Watch Out For:
1. Transplant shock
2. Pests
3. Predators and Rodents
4. Weeds
5. Diseases
Tips for Urban Farming in Michigan
1. Plant seeds indoors in April. This will ensure their strength for transplanting in May. Because we have a shorter growing season, planting indoors can help
2. Use empty toilet paper rolls, or paper towel rolls, to start growing seeds. These are the perfect height and can fit easily into a storage bin. This also helps prevent transplant shock because after the seedling grows into a baby plant, you can transplant the whole tube into the ground, keep roots safe and unexposed.
Resources*
Boland, Coit, & Hair (2002). Michigan Gardener’s Guide. Coolsprings Press: Nashvile, TN.
Bradley & Courtier(2006). Vegetable Gardening. Reader’s Digest: US.
Bridge, Terry (2010). Backyard Farming. Chartwell Books: New York.
Clarke, Graham (2010). Success with small space gardening. GMC: Sussex.
Fedor, John (2001). Organic Gardening for the 21st Century. Reader’s Digest: New York.
Fizzell, James A. (1999). Month by Month gardening in Michigan. Cool Springs Press: US.
**Hamilton, Geoff (2011). Organic Gardening. DK Publishing: New York.
Heiney, Paul (1998). The Practical Homestead. DK Publications: New York.
Herck & Graves (1997). The Enchanted Gardening Book. Random House: New York.
Houbein, Lolo(2008). One Magic Square. The Experiment: New York.
Kingsbury, Noel (2003). Natural Gardening in Small Spaces. Timber Press: Portland, Oregon.
Tullock, John (2010). Pay Dirt. Adams Media: MA.
*Check your local libraries for the past editions of these books. The information is just as useful!
**If you had to pick just one book to purchase and follow I would choose this one based on value versus price.
Koontz & Harrad (2007). Composting: Nature's Recyclers. Picture Window Books: Minneapolis, Minnesota.
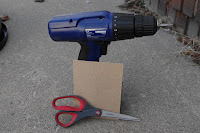
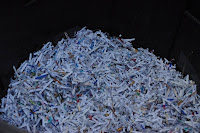
Making your own compost creates just one more way for your home to be self-sufficient. Compost can be used to fertilize your yard, garden, and potted plants. It can also be spread out over as ground cover during cold months to help protest your grass and gardens. Several ways exist to get started, so you will have to think about what is best for your home. Also, some cities don't allow for composting openly even in your own backyard, so please be sure to check into this before investing in the project. Composting costs range from very little to very expensive. I'm going to show you one way to get started for about $40. Things you will need to buy: 1 large clean garbage can with lid ($10) * Use Plastics #2 HDPE, #4 LDPE, or #5 Polypropylene. These are the only food safe plastics that will be able to withhold the temperature. 1 small shovel ($10) 1 roll of mesh screening, soft ($6) 1 roll outdoor duct tape ($9) 2 bungee cords to fit over the lid of your garbage can (about $2 each) Things you probably have around the house: 1 power drill OR hammer and awl 10 bricks 1 piece fine sand paper scissors Step 1: Gather your supplies Step 2: Create air and drainage holes Using the drill, or hammer and awl, create air and drainage holes in your garbage can. These can be placed anywhere, so long as there are enough to effectively allow of movement of air and water. The drainage holes in the bottom keep water flowing through so that the material doesn't get too wet. The air holes keep movement of oxygen constant to encourage decomposition. Keep holes small and nice spaced apart. Use the sand paper to file down and soften each hole(optional) Step 4: Set up hollow bricks in a circle in order to allow for proper drainage. Regular bricks can work, but you'll want to put them on their sides so that there is still space for water to seep back down to the ground. Place your new compost bin over the bricks. You may need more bricks to keep the composter level if the ground is at all bumpy. You will want to set this up somewhere that animals are less likely to bother the bin, but that it will get at least partial sunlight. One of the reasons small bins work is that the self-contain natural heat from the sunlight, as well as from the natural gases. Step 5: Start layering your compost. Keep this ratio in mind: 1-1-2. That's one part brown waste, or dried materials. One part is green or vegetable waste materials. The last 2 parts should be dirt. Dirt, leaves, paper, green food waste, more leaves. Add about a gallon of water over the mix and let set. Make sure to keep layering as you go. Avoid putting plastics, ink dense advertisement paper, animal waste/byproducts, and daily garbage in your compost. Yard waste, fruit and veggie trimmings, coffee grounds and paper are good starts. Try to keep the balance of the compost too by using different layers of wet and dry materials. Keep adding water each time you add layers. Now you are ready to cap your new compost bin. Make sure to check back in a couple days and use your shovel to mix up the compost.
Pleasant & Martin (2008). The Complete Compost Gardening Guide. Walsworth: US.
Sunday, March 27, 2011
DIY Back Yard Compost Container


Step 3: Add screen mesh around the bottom of the can, held on with duct tape. This helps with proper drainage as well as discourages rodents from gnawing through and into your soon to be compost.


